




Dental charting: how to read a dental chart and the odontogram
The short version
-
Dental charting is recording, tooth by tooth, what is in a patient’s mouth: which teeth are there, the condition of each, the work already done and the work needed.
-
Teeth stand in two arches. A chart cuts each arch at the midline into quadrants and straightens it into a row: the upper arch becomes the top row, the lower arch the bottom row.
-
The odontogram is the diagram the record is drawn on: every tooth in two rows, upper jaw above and lower jaw below, each tooth with its surfaces.
-
A chart can be geometric, anatomical or an arch diagram. They are three drawings of the same 32 positions, so a finding recorded in one can be read off any other.
-
Three rules read any chart. You are facing the patient, so their right is on your left. The midline runs down the centre. Each tooth is a box with five areas, one for each surface.
-
The five areas of the box are a map of a real tooth seen from its biting surface. A filling on three of them, written MOD, is the same filling an anatomical chart draws across the crown. Mesial always points to the middle of the chart.
-
Teeth are numbered by the system the country uses. In FDI charting the first digit is the quadrant and the second is the tooth’s position from the midline.
-
Symbols are conventions, not a standard, so a chart is read with its own legend. A mark on one surface is about that surface; a mark on the whole tooth is about the whole tooth.
-
Every line of a treatment plan starts as a mark on the chart. The clinical chart is a record for the next clinician; the chart on a patient’s plan is an explanation for the person deciding.
A map of one mouth
Open any patient record and the first thing you see is a diagram: two rows of teeth, some shaded, some crossed out, some ringed. Dental charting is how that diagram gets made, and reading it is one of the first skills anyone working in a practice has to learn.
It is also less mysterious than it looks. A dental chart has 32 positions, five surfaces per tooth and a small set of markings. Once you know how the map is laid out, most charts can be read in a minute.
What dental charting is
Dental charting is recording, tooth by tooth, what is in a patient’s mouth: which teeth are present, the condition of each one, the work that has already been done and the work that is needed. The record that results is the dental chart.
A chart is started at the first examination and brought up to date at every visit after it. It holds three kinds of entry: what is already there, such as fillings and crowns; what was found, such as decay or a fracture; and what is planned.
Two different charts share the name. The tooth chart records the teeth themselves: fillings, crowns, decay, missing teeth. The periodontal chart records the gums, with a depth measured at several points around every tooth. This post is about the first.
A chart is written for another clinician. It has to let a colleague who has never met the patient see the whole mouth at a glance, which is why it is a drawing and not a paragraph.
From the mouth to the chart: two arches, four quadrants
Teeth do not sit in rows. They stand in two arches, an upper and a lower, each shaped like a horseshoe with the front teeth at the bend and the molars at the two ends. A chart has to flatten that shape, and it does so in two steps.
First, each arch is cut in half at the midline, the gap between the two front teeth. That gives four pieces, the quadrants: upper right, upper left, lower left and lower right, always named from the patient’s side. Each quadrant of an adult mouth holds eight teeth, from the central incisor at the midline to the third molar at the back.
Second, each arch is straightened. Picture taking the horseshoe by its two ends and pulling it flat: the front teeth stay in the middle, and the molars end up at the far left and the far right. The upper arch becomes the top row of the chart and the lower arch becomes the bottom row.
Nothing is lost in the flattening except the curve. Every tooth keeps its neighbours and its place in its quadrant, so a tooth you can point to in the mouth has exactly one position on the chart, and the other way round. The one thing to hold on to is the viewpoint. The chart is drawn as you face the patient, so the two quadrants on the patient’s right are on the left half of the chart.
What an odontogram is
An odontogram is the diagram itself: a schematic of all the teeth, laid out in two rows with the upper jaw above and the lower jaw below, each tooth drawn so that its surfaces can be marked one by one. Charting is the activity, and the odontogram is what you chart on.
The word is the everyday term in much of Europe and Latin America. In English-speaking practices the same thing is usually called a tooth chart or simply the chart.
The formats of a dental chart, and how they fit together
Open three practice systems and you will see three different-looking charts. They are three drawings of the same 32 positions.
| Format | How a tooth is drawn | What it shows best | What it cannot show |
|---|---|---|---|
| Geometric chart | The same box for every tooth, with five areas | Which surfaces carry a filling or decay | What is inside or under the tooth, such as a root canal filling or an implant |
| Anatomical chart | The tooth as it looks from the side, crown and roots | Whole-tooth findings: a crown, a root canal filling, an implant, a missing tooth | The surfaces a side view hides, unless a second view is added |
| Arch diagram | The teeth from above, along the horseshoe | Position, spacing and the bite | The roots, and anything below the gum line |
The geometric chart is the quickest form for recording fillings and decay. The arch diagram is the least common in daily charting and the closest to what you see when the patient opens their mouth.
Most charts in use are a combination: an anatomical drawing of each tooth with a surface box beside it, or an anatomical drawing on which the surfaces themselves can be marked. Whatever the form, the order of the teeth, the quadrants and the numbers are identical, so a finding recorded in one can be read off any other.
- 18
- 17
- 16
- 15
- 14
- 13
- 12
- 11
- 21
- 22
- 23
- 24
- 25
- 26
- 27
- 28
- 48
- 47
- 46
- 45
- 44
- 43
- 42
- 41
- 31
- 32
- 33
- 34
- 35
- 36
- 37
- 38
How to read a dental chart
Three rules read almost any dental chart.
You are facing the patient. The chart is drawn as if you were looking into the mouth, so their right is on your left. The upper right teeth are at the top left of the diagram.
The midline runs down the centre. Teeth are arranged outwards from the gap between the two front teeth, so the incisors are in the middle of each row and the molars at the ends.
Each tooth is drawn as a box with five areas, one for each surface. The centre is the biting surface. The four sides around it are the surface facing the midline, the surface facing away from it, the surface facing the cheek or lip, and the surface facing the tongue or palate. Their clinical names are occlusal, mesial, distal, buccal and lingual.
From there the logic is simple. A mark on one surface is about that surface: a filling on the biting surface, decay on the side facing the next tooth. A mark on the whole tooth is about the whole tooth: a crown, a root canal treatment, a tooth that is missing.
From the box to the tooth: how a marked surface becomes a filling
The five areas of the box are a map of a real tooth, seen from its biting surface. The centre is the top of the tooth, the part that meets the tooth in the other jaw. The area on the midline side is the mesial surface, the wall that touches the neighbour in front. The area on the far side is the distal surface, the wall that touches the neighbour behind. The two remaining areas are the outer wall, towards the cheek or lip, and the inner wall, towards the tongue or palate.
Take one finding and follow it through. An upper left first molar, tooth 26, has an old filling that runs from its front wall, across the biting surface, to its back wall. On a geometric chart three areas of its box are filled in: mesial, occlusal and distal. Written down, it is 26 MOD. On an anatomical chart the same filling appears on the drawing of the tooth itself, across the top of the crown and reaching both sides.

Decay is charted the same way, with the areas marked in the colour the chart uses for findings. Read back, a box with its mesial and occlusal areas marked says that there is decay between this tooth and the one in front of it, and that it reaches the biting surface.
How teeth are numbered on a chart
Teeth are numbered by whichever system the country uses, and the number sits above or below each tooth on the chart.
Most of the world uses FDI charting, the two-digit system published as ISO 39501ISOiso.orgISOOpen the source. In it the first digit is the quadrant and the second is the tooth’s position counted from the midline. Tooth 36 is quadrant 3, the lower left, position 6, the first molar. It is read “three six”.
The United States uses the Universal system, which numbers the teeth 1 to 32 in one loop, and parts of the United Kingdom still use Palmer notation, a number from 1 to 8 inside a bracket that shows the quadrant. A review of tooth-coding systems2Dental Anthropologyjournal.dentalanthropology.orgDental AnthropologyOpen the source describes how the three came to exist side by side. The teeth and their order are the same in all of them. Only the labels change.
Dental charting symbols
Dental charting symbols mark what was found on each tooth. Symbols are conventions, not a standard: they differ between countries, dental schools and software, so every chart should be read with its own legend. The findings below are the ones almost every chart can record. Each is shown twice: as a geometric chart usually marks it, and as an anatomical chart draws it, here in the form Plandentic uses.
- Decay Decay on the marked surfaces
- Filling A filling on those surfaces
- Crown A crown over the whole tooth
- Root canal treatment The inside of the roots cleaned and filled
- Missing tooth The tooth is no longer there
- Implant An artificial root, usually carrying a crown
- Bridge A replacement tooth carried by the teeth on either side


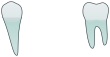

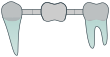
Many charts also use colour to separate what is already there from what needs doing: one colour for existing work, and another, often red, for findings that need treatment. Short letter codes written beside a tooth, for a material or an X-ray finding, are a subject of their own, covered in our note on dental abbreviations.
A worked example: from the chart to the plan
Every line of a treatment plan starts as a mark on the chart. Take a chart with three findings and follow each one through.
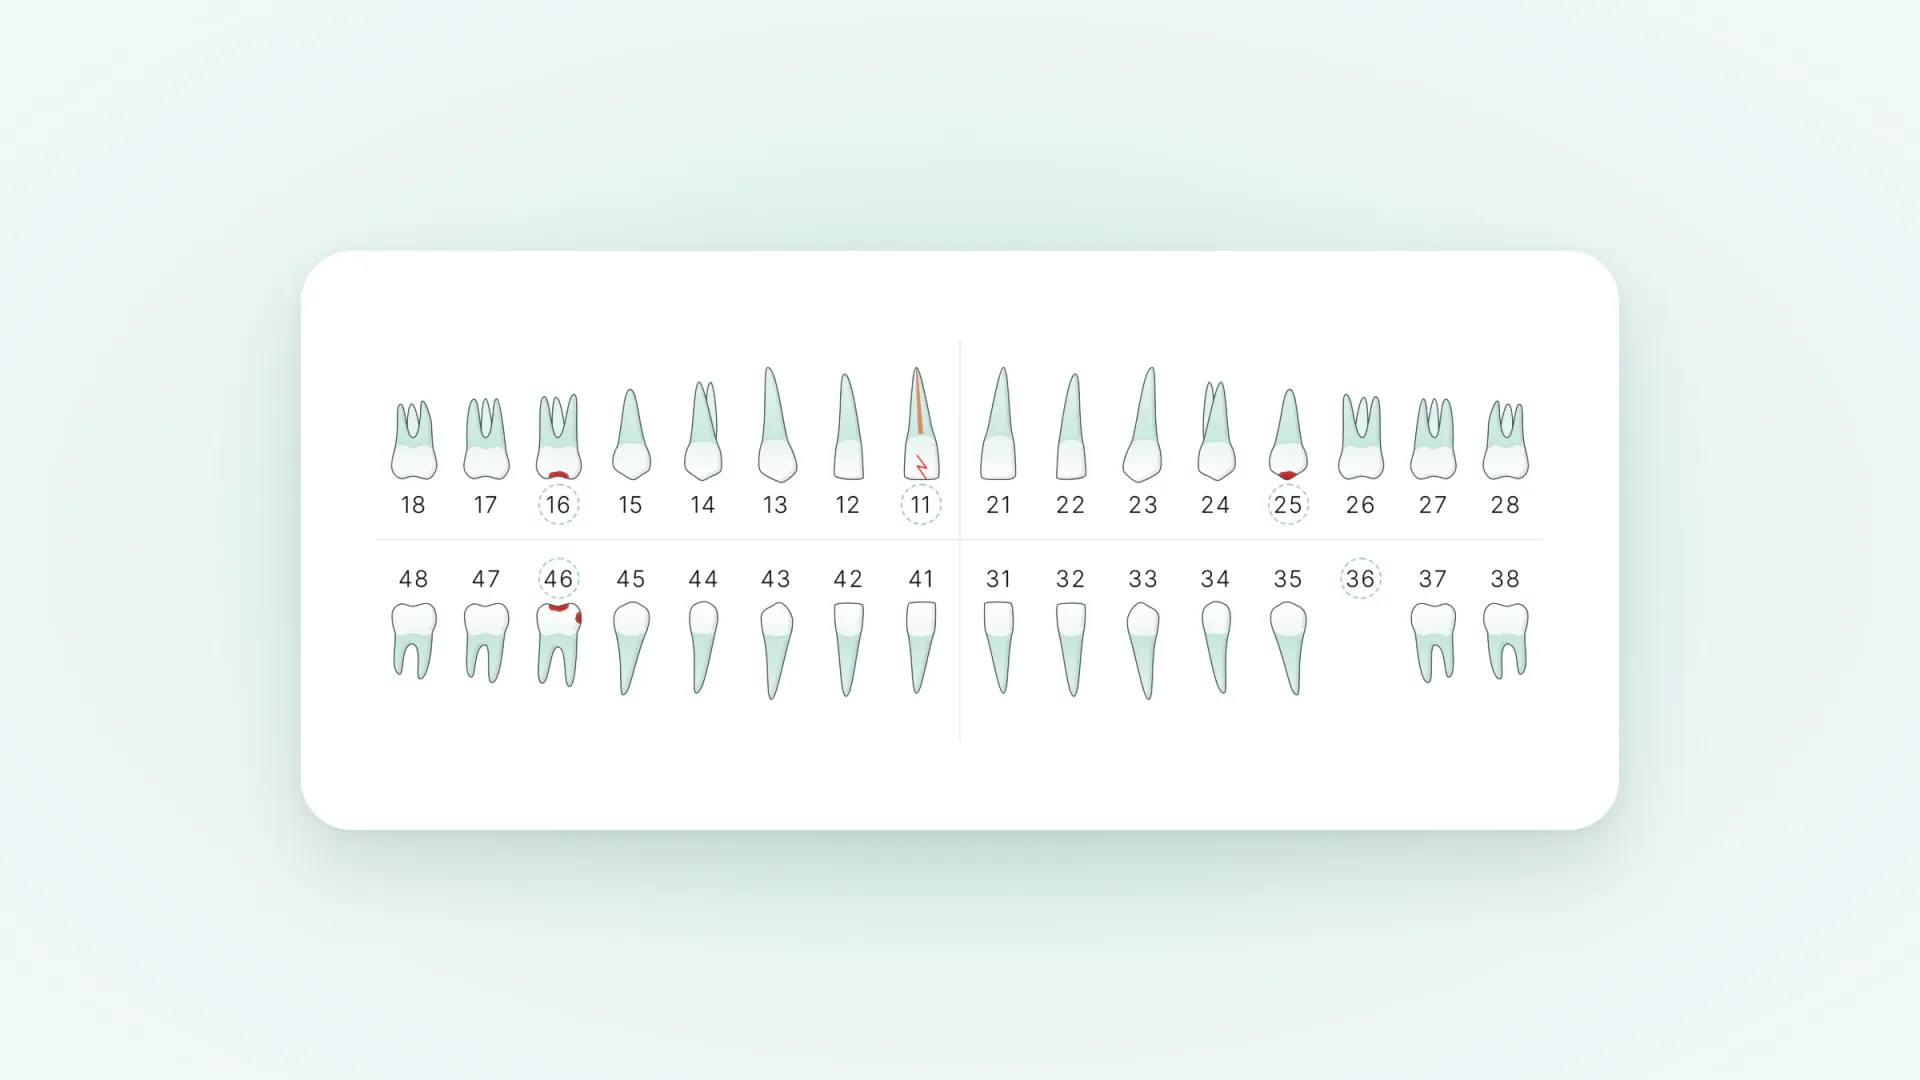
Tooth 46 has decay marked on the biting surface and on the side facing the tooth in front. On the plan that becomes one line: a filling on two surfaces of the lower right first molar.
Tooth 36 is crossed out. A missing tooth can be replaced in more than one way, so the plan carries two options side by side: an implant with a crown, or a bridge carried by the teeth on either side, 35 and 37.
Tooth 11 has a line down the root and a fracture marked at the edge. The plan line is a crown on the upper right front tooth, which has already had a root canal treatment.
- 46 Filling on two surfaces Lower right first molar
- 36 Option A: implant with a crown Option B: bridge from 35 to 37
- 11 Crown Upper right front tooth, root canal treated
Three marks became three lines, and one of them became a choice. That is all a treatment plan is at its core: the chart, read forwards into what happens next.
A chart says what is there. A plan says what happens next. The patient only ever asked the second question.
Dental charting for beginners: five habits
If you are new to charting, five habits prevent most mistakes.
- Orient yourself before you read anything: find the midline, then say which side is the patient’s right.
- Read and say every entry in the same order: the tooth, then the surface, then the finding.
- Chart what is there before what is planned. Existing work and findings come first, and treatment is a second pass.
- Look at a tooth’s neighbours when a mark seems odd. A filling on a tooth the chart shows as missing is usually an entry on the wrong tooth.
- Read the chart back against the mouth, or against the X-ray, before you close it.
The chart on a patient’s plan
The clinical chart and the chart a patient sees have different readers. The clinical chart is a record for the next clinician, and its shorthand is a feature. To a patient the same diagram is a grid of symbols, and in one study of spoken clinical terms, patients’ understanding varied widely3British Dental Journalnature.comBritish Dental JournalOpen the source even with a clinician there to ask.
A chart only helps the patient if it has been turned into an explanation for the person deciding: their own teeth, the problem shown in one colour and the planned treatment in another, and each treatment written out in words.
At Plandentic, the chart is where a plan starts. You mark the findings and the planned treatment on a tooth chart, in the notation your clinic uses, and the patient’s plan shows the same mouth as a picture they can read: what was found, and what it becomes after treatment. The Plandentic chart records a diagnosis and a plan. It is not the clinical record and it is not a periodontal chart, and it works alongside the software that holds both. It is the first step of dental treatment plan software built for the conversation with the patient, not for the archive.
Questions about dental charting
-
What is dental charting?
Dental charting is recording, tooth by tooth, what is in a patient’s mouth: which teeth are present, the condition of each, the work already done and the work needed. The record is called the dental chart.
-
What is an odontogram?
An odontogram is the diagram a dental chart is drawn on: all the teeth in two rows, upper jaw above and lower jaw below, each tooth drawn so that its surfaces can be marked. In English-speaking practices it is usually called a tooth chart.
-
How do you read a dental chart?
Start from the viewpoint: the chart is drawn as you face the patient, so the patient’s right is on your left. Find the midline in the centre, then the tooth by its number, then the surface that is marked.
-
How many surfaces does a tooth have on a chart?
Five. The biting surface in the centre and four sides around it: mesial towards the midline, distal away from it, buccal towards the cheek or lip, and lingual towards the tongue or palate.
-
What are the four quadrants of the mouth?
Each arch is divided at the midline, which gives the upper right, upper left, lower left and lower right quadrants, always named from the patient’s side. Each holds eight permanent teeth.
-
What is the difference between a tooth chart and a periodontal chart?
A tooth chart records the teeth themselves: fillings, crowns, decay, missing teeth. A periodontal chart records the gums, with a depth measured at several points around every tooth.

